Incorporating ZealiD VC to your application
ZealiD issues verified credentials (VC) in collaboration with Microsoft Entra. To get started with ZealiD's verified credentials you'll need to follow the steps described here under Verifier flow
You'll need:
- A tenant configured for Microsoft Entra Verified ID service If you don't have an existing tenant, you can create an Azure account for free
- Go to Microsoft Entra admin centre
- Select QuickStart > Verification Request > Start
- or Home > Verified ID > Overview > Create a verification request
- Choose Select Issuer
- Find ZealiD from the Issuers list
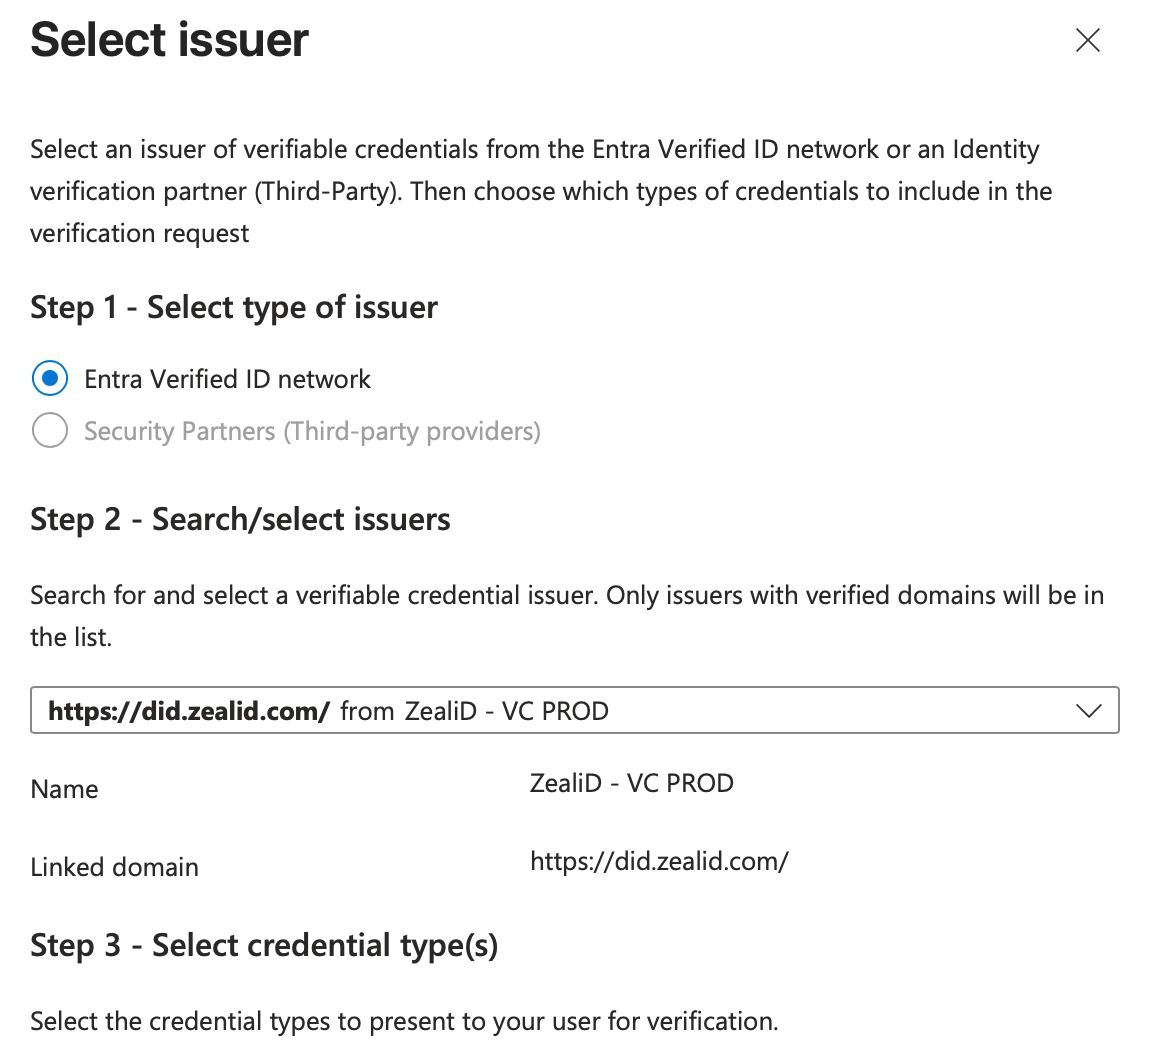
- Select credential type
- Select Add and then select Review
- Download the request body and Copy/paste POST API request URL
To request Verified IDs from your users, include the request URL and body in your application or website.
Find out more about ZealiD and VC on ZealiD's website
ZealiD VC in the ZealiD application
Install the latest ZealID app from Google Play or Apple app store on your device. If you have the app already you may need to update it to get access to VC feature.
Complete ZealiD onboarding flow. The onboarding flow includes facial recognition and identity document scan steps which are the basis for trustworthy digital identity.
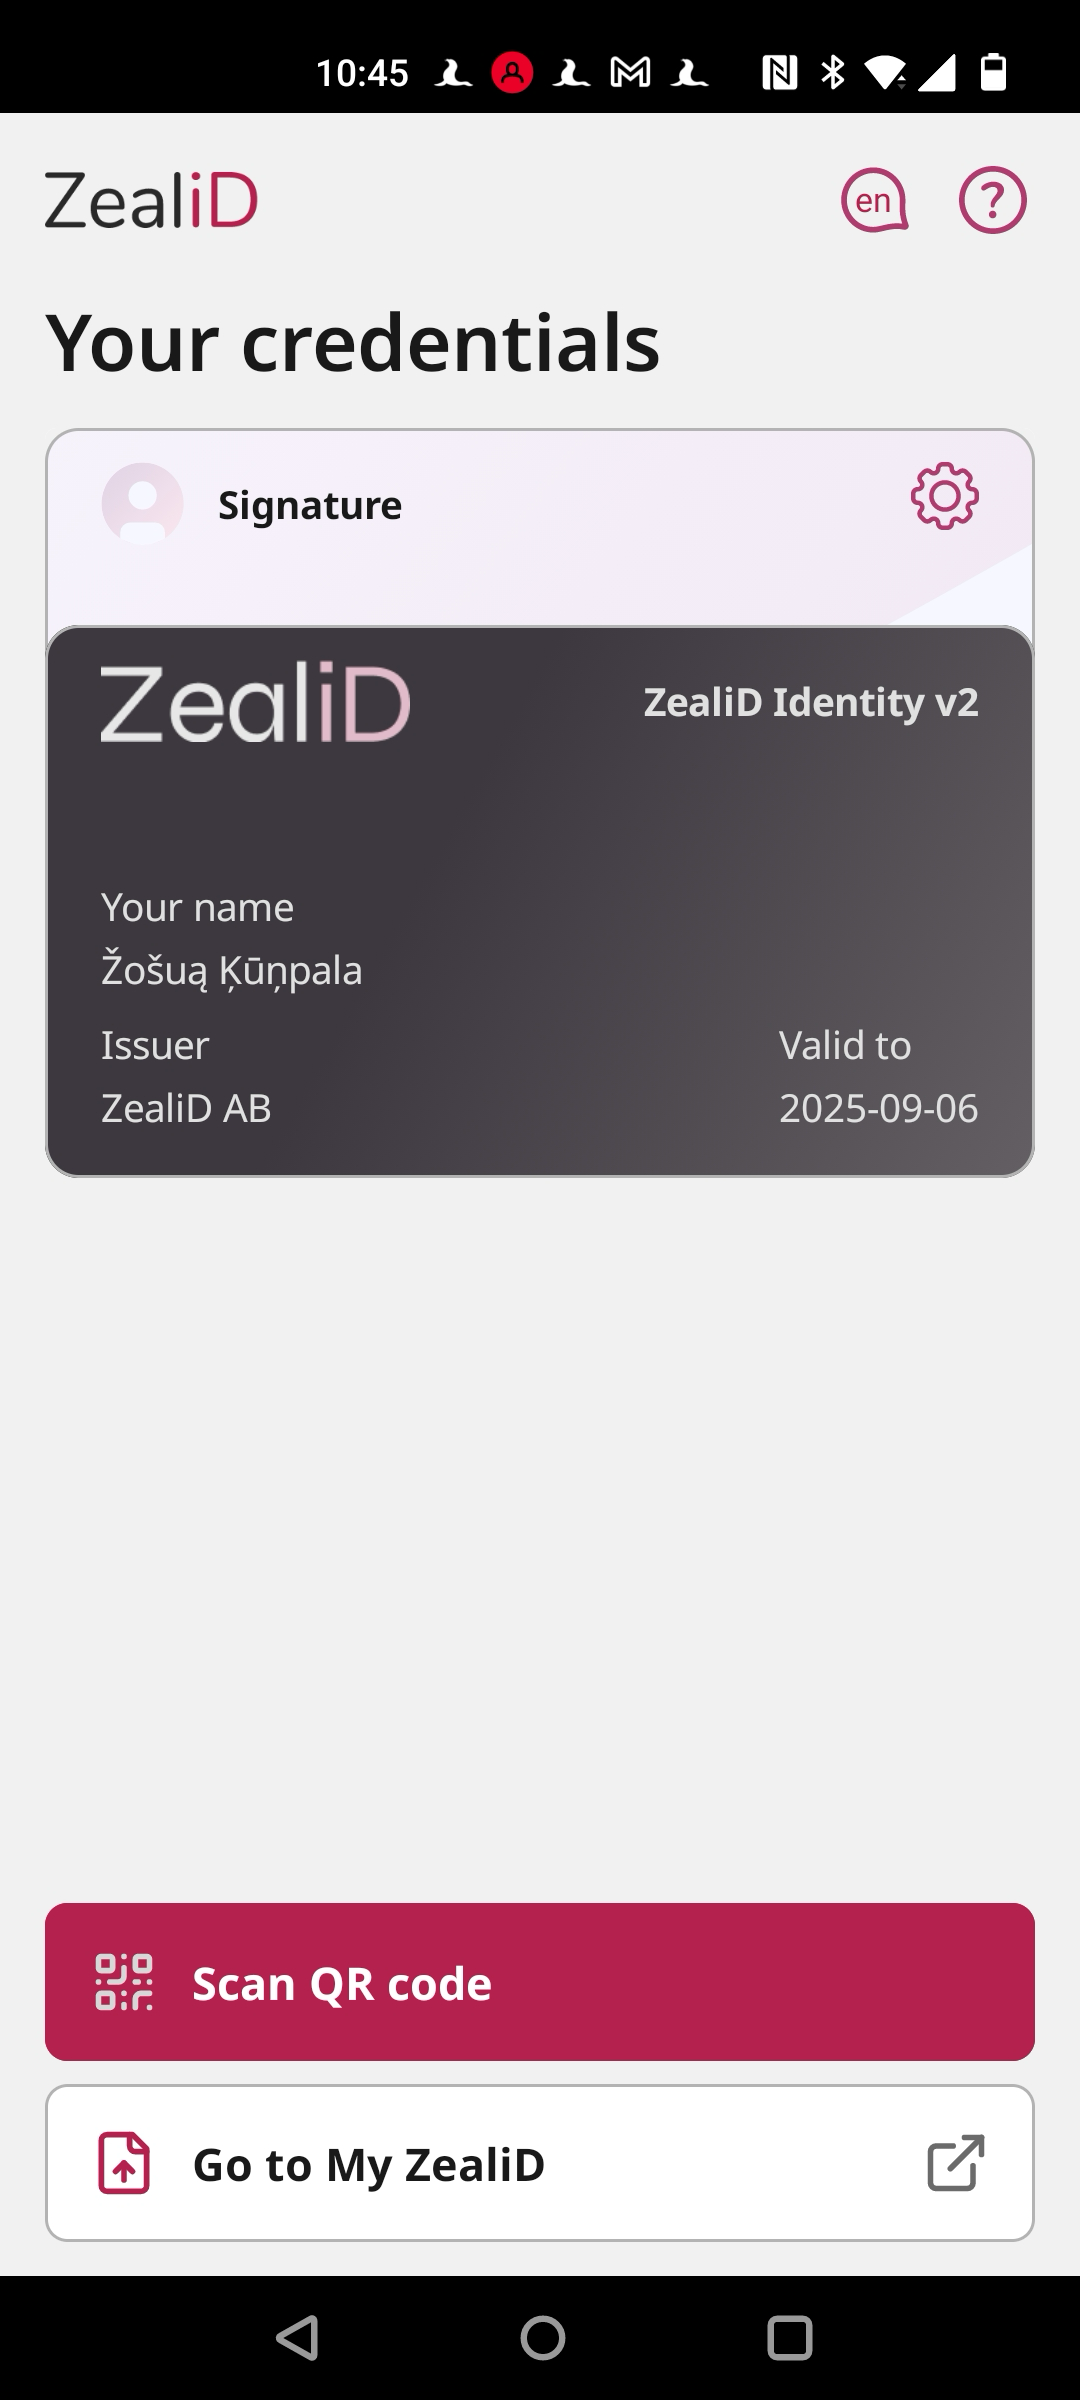
ZealiD app acts as a wallet for your Verified Credentials.
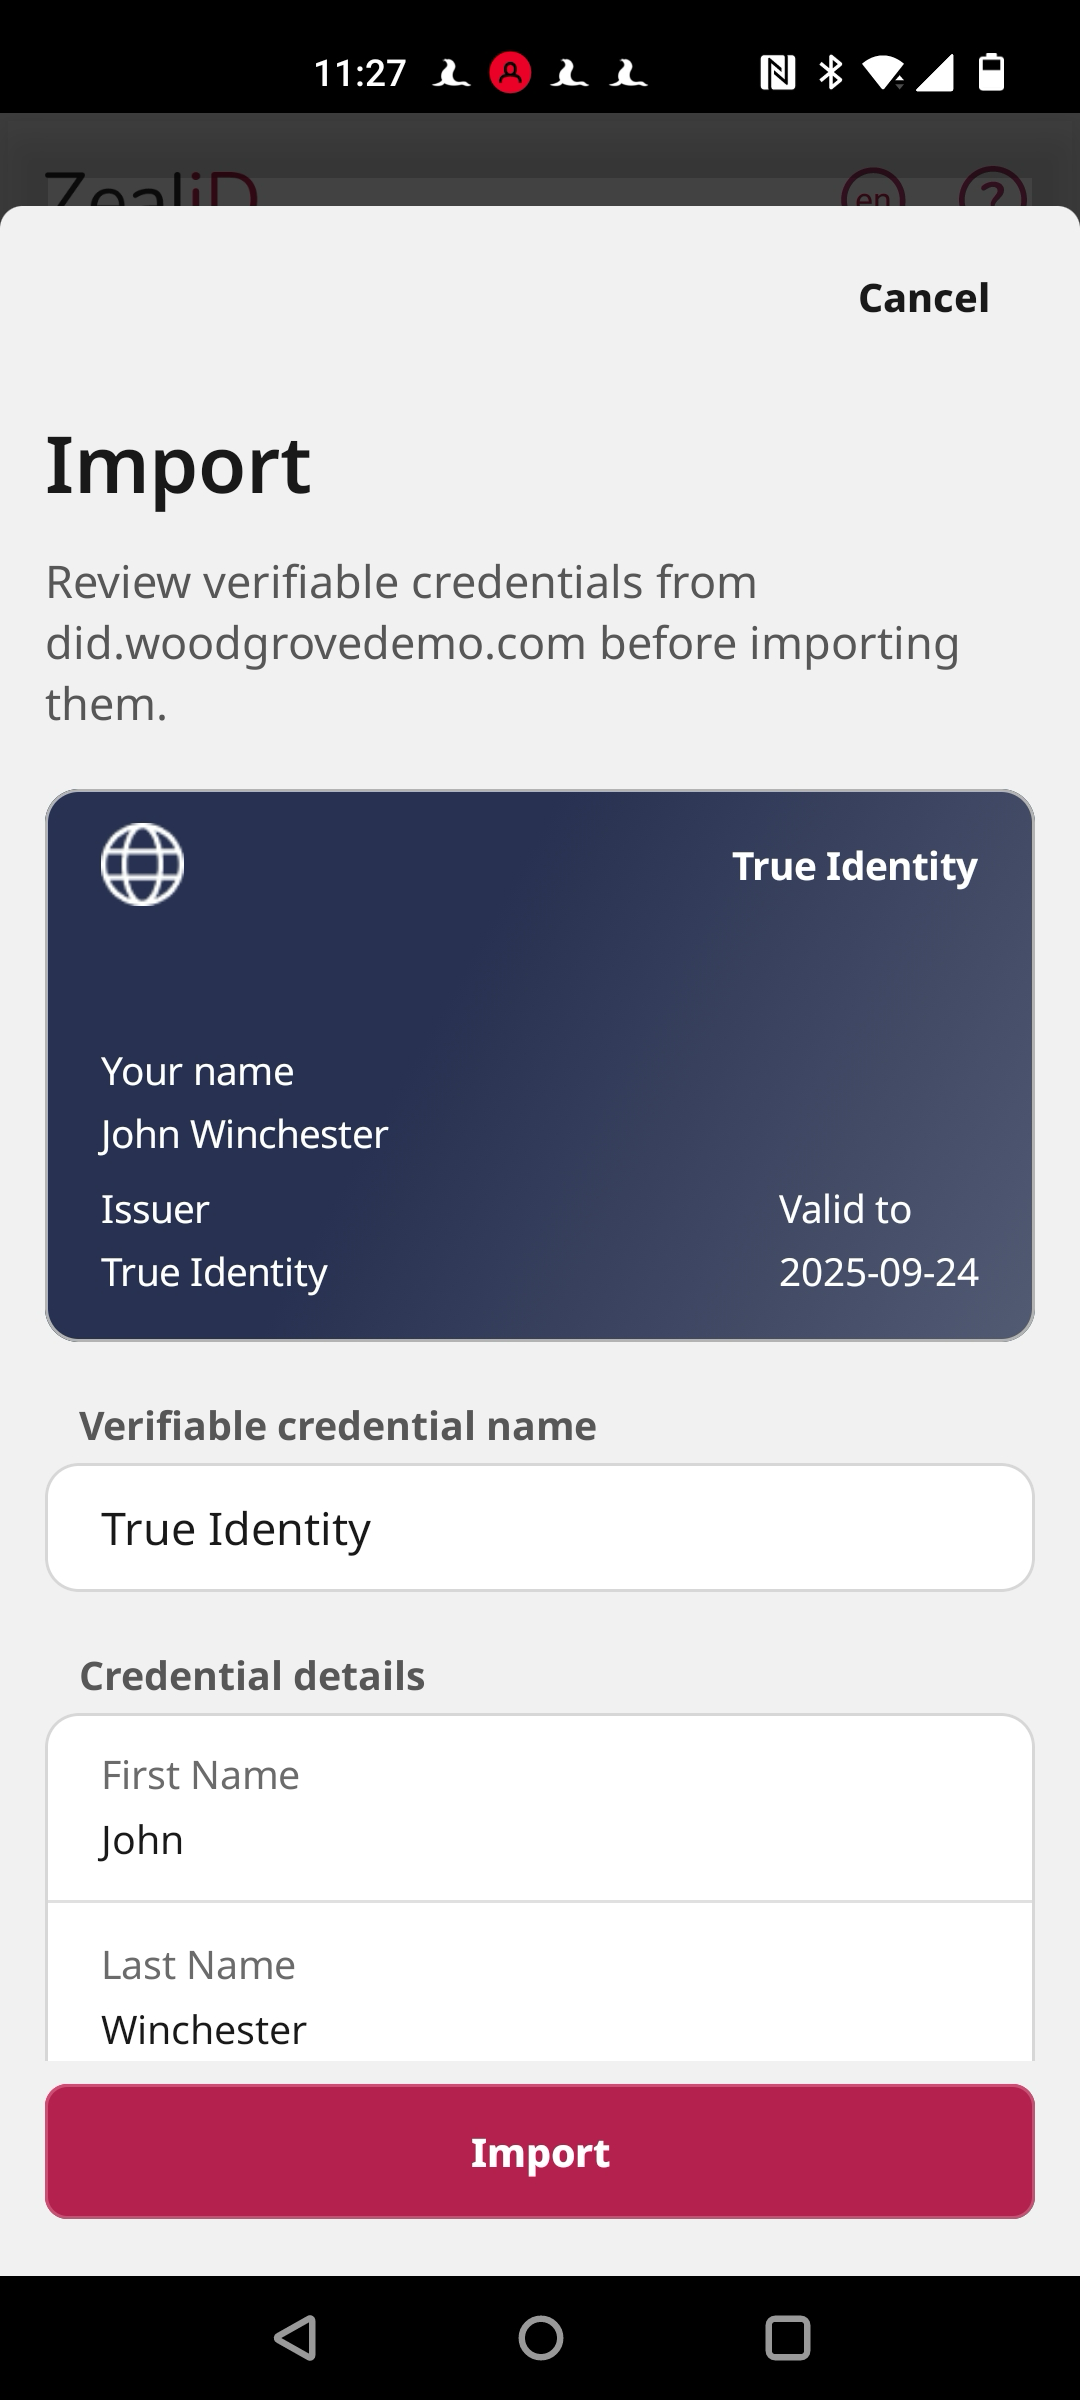
To add new verified credential, simply scan the QR code from credential's supplier site and follow the credential import process.
Once you are done, new credential will show up on your Home screen. You can check credential's details or remove it as you like. Note that the validity of your VC is determined by the VC's issuer, deleting it from ZealiD's VC wallet won't terminate it's validity.
To share your credential with a service provider, simply use the QR code scanner on the service provider's site and select which VC you wish to share with the service provider.
Updated about 11 hours ago